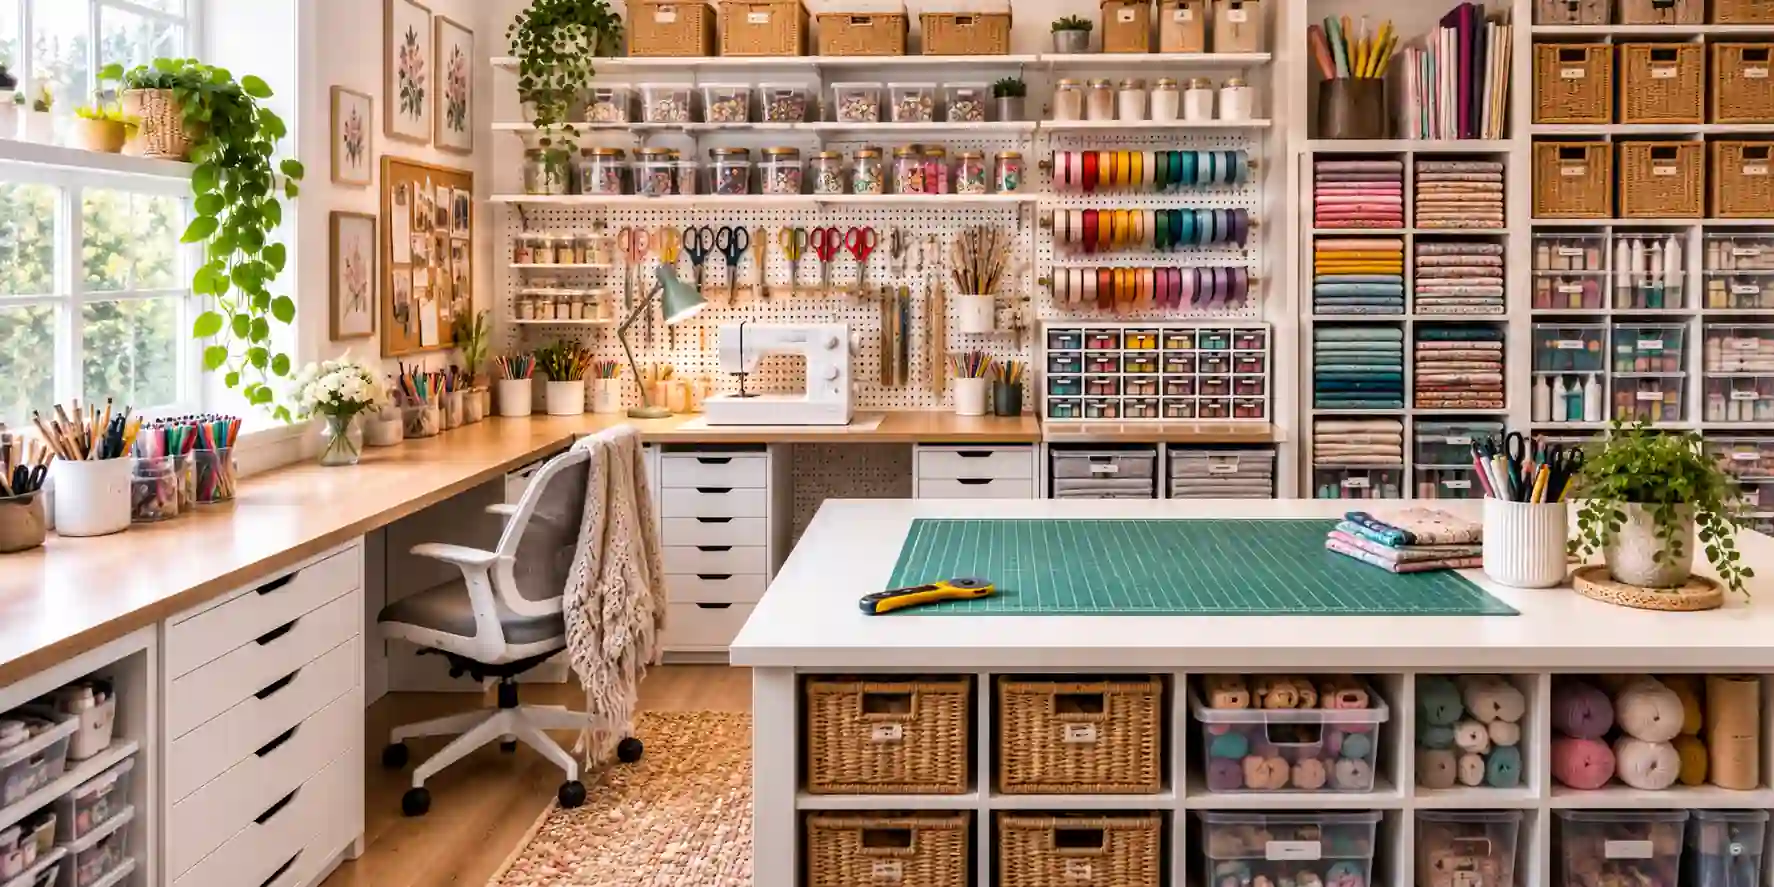
A craft room should be a place where creativity feels effortless, inspiring, and enjoyable. But when supplies are scattered everywhere, drawers are overflowing, and you can never find the scissors or glue when you need them, crafting can quickly become frustrating. The good news is that you don’t need a huge room or an expensive renovation to create a functional and beautiful creative space.
With smart storage solutions, thoughtful layouts, and a few creative organizing tricks, you can transform even a small corner into a practical craft room that works perfectly for your hobbies. Whether you love sewing, painting, scrapbooking, knitting, DIY projects, Cricut crafts, or handmade decorations, the right organization system can help you keep everything accessible while maintaining a tidy environment.
In this guide, we’re sharing 10 Craft Room Organization ideas that combine style and functionality. From wall-mounted storage to clever drawer systems, these ideas will help you make the most of your space and create a craft room where inspiration comes naturally.
1. Create a Dedicated Craft Workstation
One of the best ways to organize a craft room is to start with a dedicated workstation. Your main work surface should be large enough for your most common projects while still leaving enough room for essential supplies.
If you have a spacious room, consider using a large craft table in the centre. This arrangement allows you to move around the table and work from different sides. For smaller rooms, a desk positioned against the wall can provide a practical alternative without taking up too much floor space.
Choose a desk with built-in drawers whenever possible. These drawers can store frequently used supplies such as scissors, rulers, cutting tools, pens, markers, adhesives, and measuring tapes. Keeping these items within arm’s reach will make your crafting sessions much more efficient.
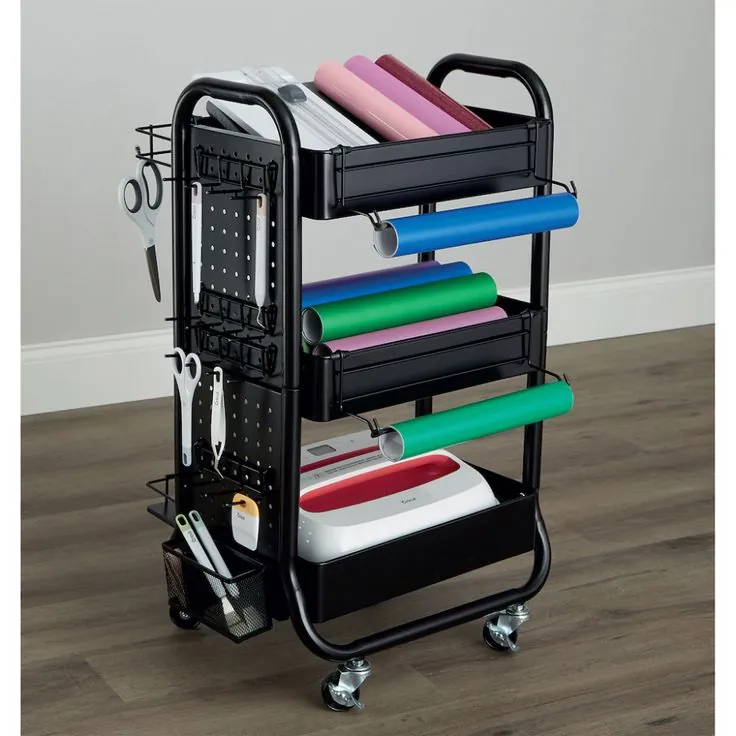
You can also add a rolling cart underneath or beside the workstation. A mobile cart is particularly useful if you regularly work on different types of crafts. For example, you can keep painting supplies on one shelf, sewing materials on another, and paper crafts on the third.
Consider adding a comfortable, adjustable chair as well. If you spend hours crafting, good seating can make a significant difference. The goal is to create a workstation that feels inviting while providing enough space to work comfortably.
2. Use Wall Space for Vertical Storage
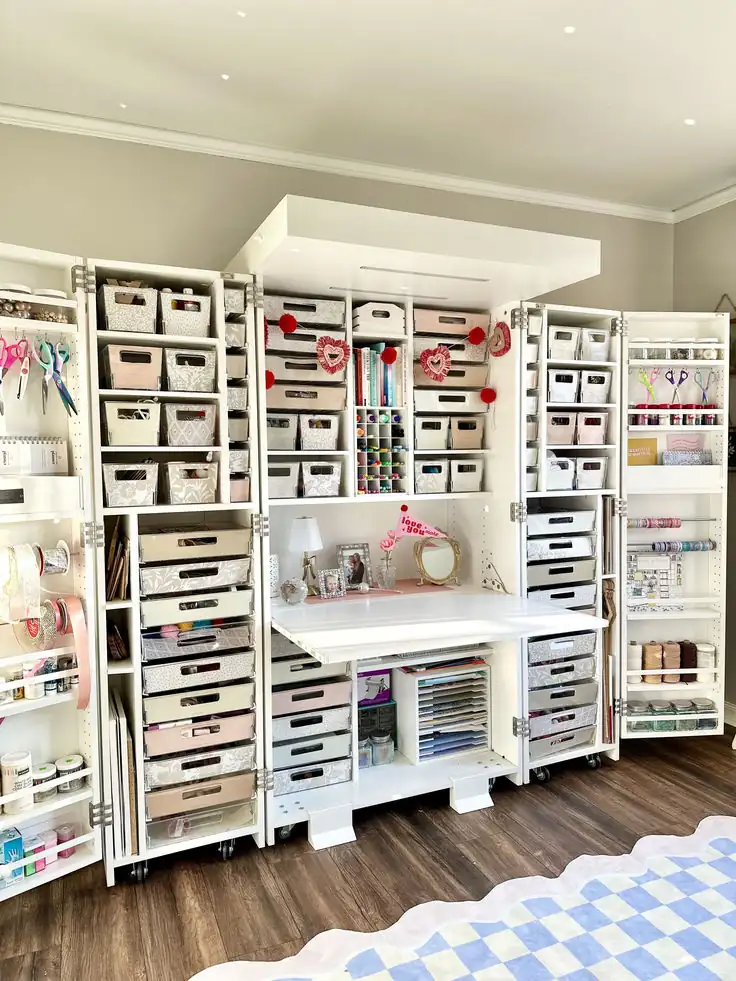
When floor space is limited, look up. Walls are often one of the most underused areas in a craft room, and they can provide valuable storage without making the room feel crowded.
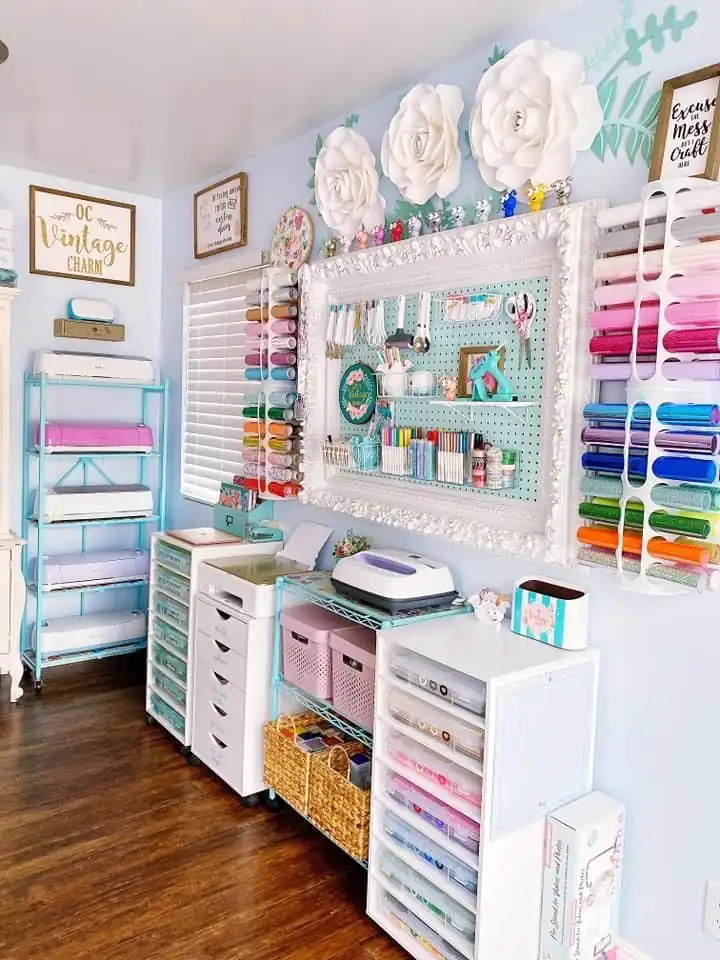
Install pegboards above your desk to create an adaptable storage system. Hooks can hold scissors, rulers, cutting tools, paintbrushes, and other small equipment. You can rearrange the hooks whenever your storage needs change, making pegboards a flexible solution for creative spaces.
Floating shelves are another excellent option. Use them to display attractive jars filled with colourful buttons, ribbons, yarn, or beads. Open shelving not only keeps supplies visible but can also add personality and colour to your craft room.
A wall-mounted rail system can be useful for storing rolls of wrapping paper, ribbon, or fabric. Instead of keeping these materials in a cupboard where they may become tangled, hang them vertically so you can easily see and access each roll.
For a polished look, try grouping similar items together. You could dedicate one wall to sewing supplies, another to paper crafts, and another to decorative materials. This makes the room easier to navigate and gives every category a designated home.
3. Organize Supplies in Clear Containers
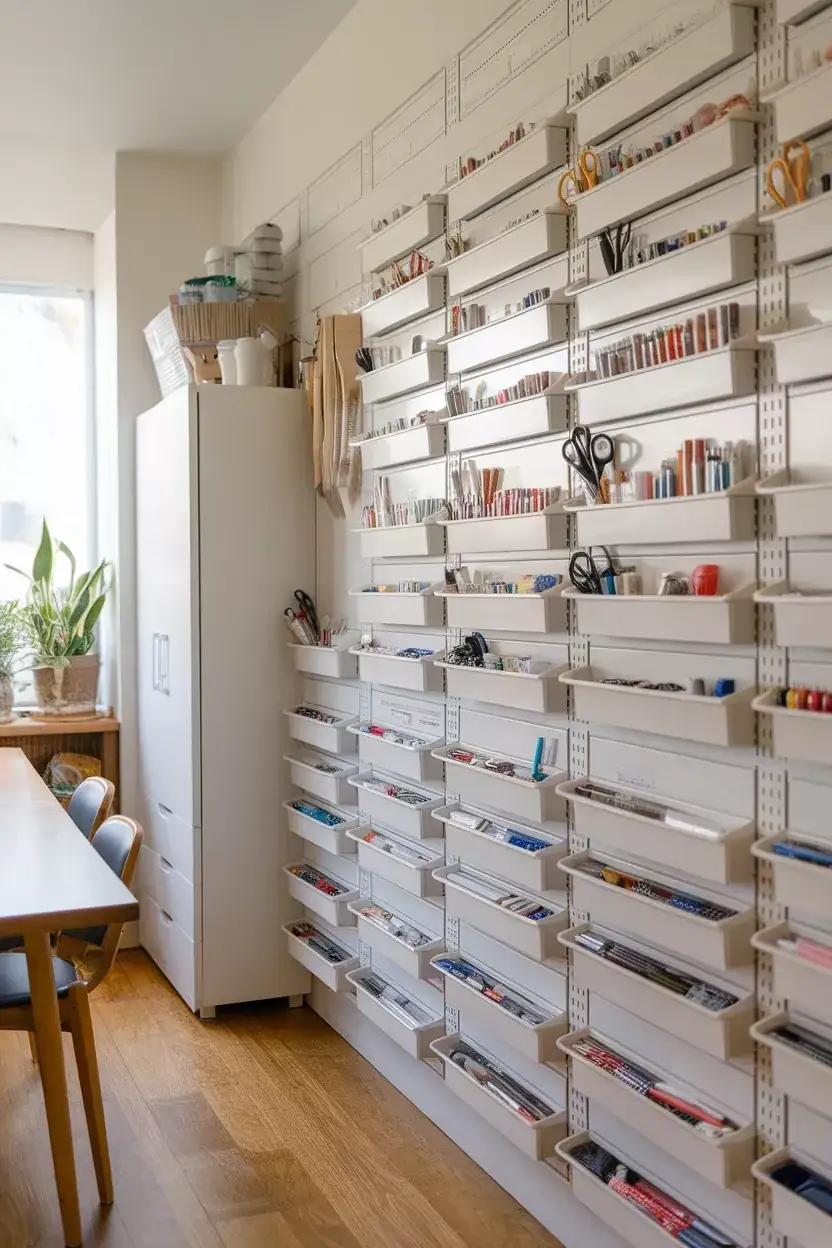
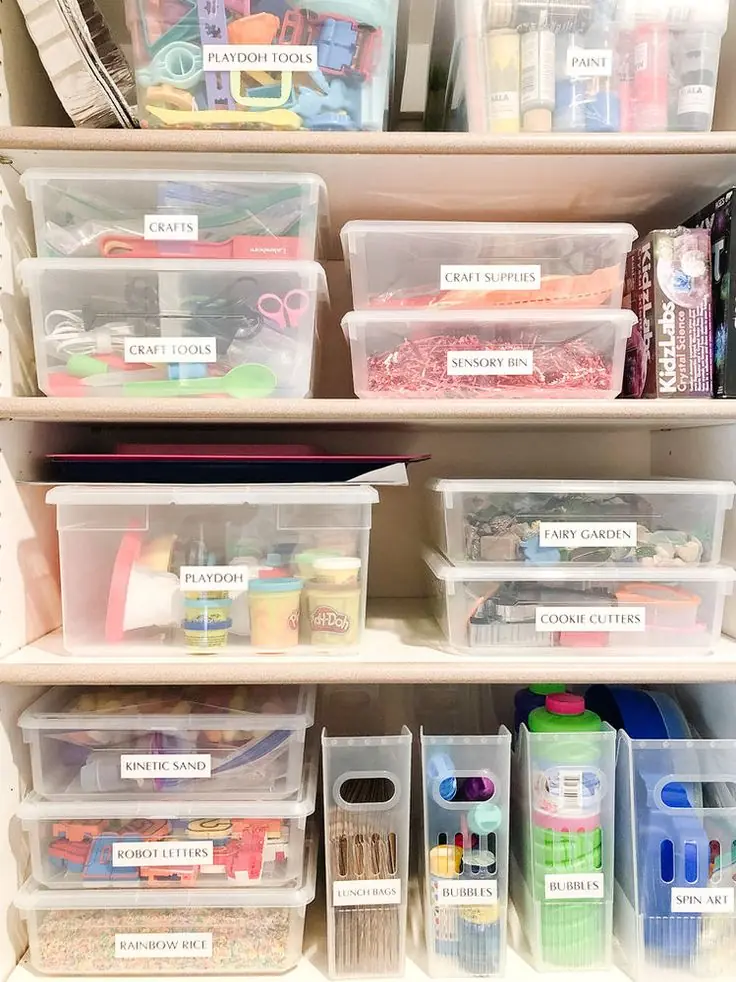
Clear containers are one of the simplest ways to keep craft supplies organized. Because you can see what’s inside without opening every box, they make it much easier to find exactly what you need.
Use transparent bins for larger supplies such as fabric, yarn, scrapbook paper, and seasonal decorations. Smaller clear containers are perfect for beads, buttons, sequins, clips, and embellishments.
Label each container clearly, even if the contents are visible. Labels help you maintain your organization system over time and make it easier to put things back in the correct place.
For example, you might create separate containers labelled:
- Ribbons
- Buttons
- Beads
- Paint Supplies
- Sewing Notions
- Scrapbook Materials
- Embroidery Supplies
- DIY Tools
Stackable containers are particularly useful when storage space is limited. They allow you to take advantage of vertical space inside cabinets and on shelves.
Try to choose containers that are similar in size and style. A consistent collection of storage boxes can instantly make a craft room look cleaner and more cohesive.
4. Add a Rolling Cart for Flexible Storage
A rolling cart is a fantastic addition to any creative workspace because it combines storage and mobility. Instead of carrying supplies back and forth between your storage area and desk, simply roll the cart wherever you are working.
Use one cart for your most frequently used supplies. For example, the top shelf could hold scissors and adhesives, the middle shelf could contain paints and brushes, and the bottom shelf could store larger tools.
If you have several crafting hobbies, consider creating dedicated carts for different activities. One could be your sewing cart, while another could hold painting or scrapbooking materials.
The advantage of a rolling cart is that it doesn’t have to remain in one location. When you’re finished crafting, you can move it into a corner or underneath a desk to free up floor space.
You can also personalise the cart with labels or small storage baskets. Choose a design that complements your craft room decor so the cart looks like part of the room rather than an ordinary storage solution.
5. Design a Smart Sewing and Fabric Storage Area
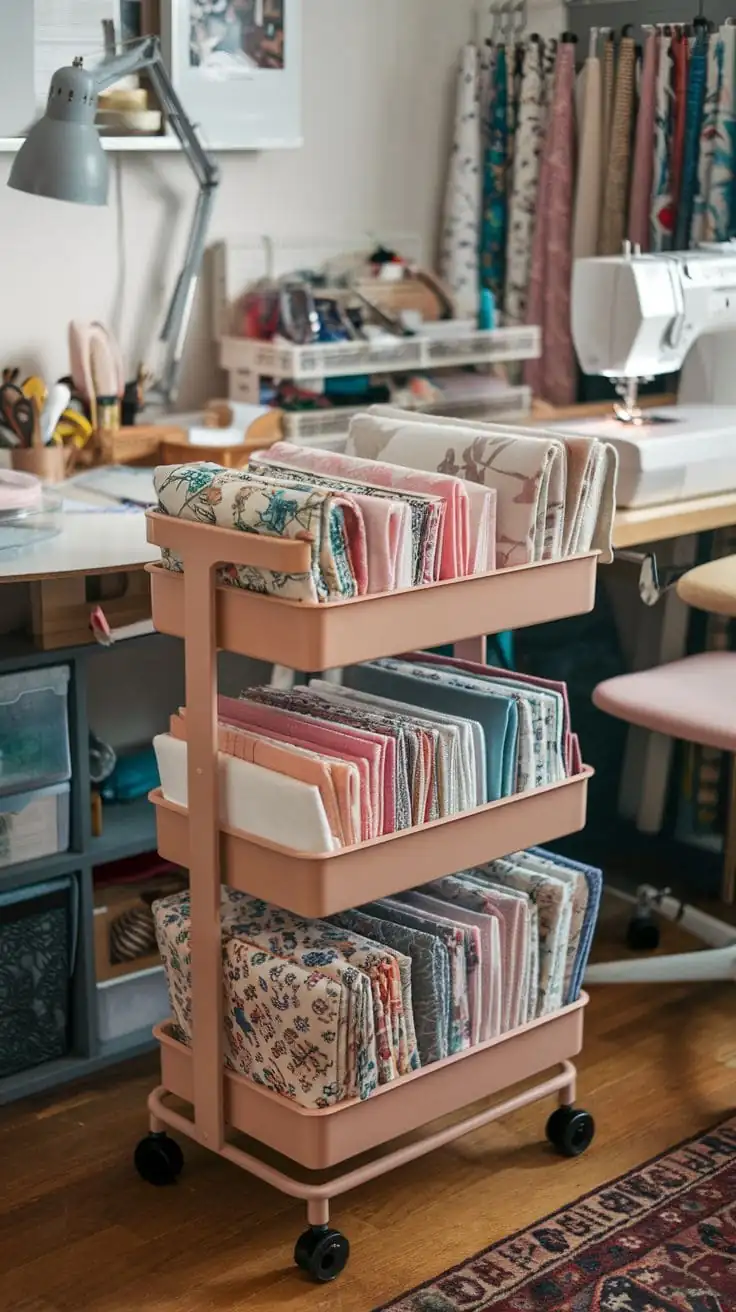
If sewing is one of your favourite hobbies, fabric organization deserves special attention. Fabric can quickly become bulky and difficult to manage, especially when different colours, patterns, and textures are mixed together.
One effective solution is to fold fabric pieces into similar-sized rectangles and store them vertically in cubbies. This allows you to see your entire collection at once rather than digging through a large pile.
You can also organise fabric by colour, pattern, or material. For example, keep cotton fabrics together, separate heavier fabrics, and create another section for seasonal or specialty materials.
Thread can be stored on a wall-mounted thread rack or inside a drawer organiser. Arranging thread by colour makes it easier to find the exact shade you need.
If you have a large collection of sewing supplies, consider adding a dedicated cabinet with shallow drawers. Shallow storage is ideal for needles, bobbins, zippers, buttons, measuring tapes, and other small sewing accessories.
Don’t forget about your sewing machine. Keep it on a sturdy surface with enough room to work comfortably. If you don’t use it every day, a cabinet with a fold-down or pull-out surface can help you save valuable space.
6. Make Use of Drawer Dividers
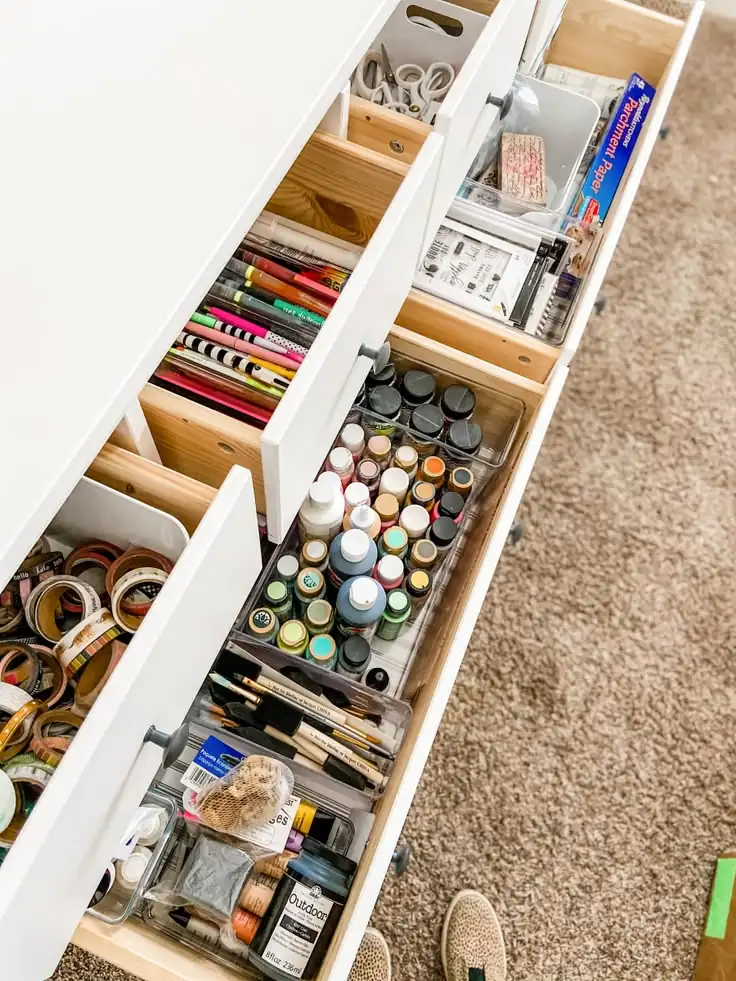
Craft rooms often contain hundreds of tiny items, and drawers can quickly become chaotic without a proper organization system. Drawer dividers are an easy way to create separate compartments for small supplies.
Use dividers for items such as:
- Scissors
- Cutting tools
- Pens and pencils
- Paintbrushes
- Glue sticks
- Washi tape
- Rulers
- Stencils
- Needles
- Small embellishments
Adjustable dividers are especially useful because you can change the compartment sizes as your collection grows.
For very small items, consider using shallow trays or small removable boxes inside drawers. This prevents beads, buttons, and other tiny materials from mixing together.
The key is to give every category a specific location. If you know exactly where your supplies belong, tidying up after a project becomes much faster.
7. Create an Inspiring Craft Supply Display
Organization doesn’t have to be purely practical. Your storage system can also become part of your craft room decor.
Open shelves filled with colourful supplies can create a cheerful and inspiring atmosphere. Arrange jars of buttons, baskets of yarn, rolls of ribbon, and stacks of patterned paper in an attractive way.
Glass jars are particularly beautiful for displaying small colourful materials. Fill them with beads, buttons, pom-poms, wooden shapes, or colourful craft sticks. Grouping these items by colour can create a decorative rainbow effect.
You can also display your favourite finished projects. Hang handmade artwork, embroidery, framed paper crafts, or photographs of completed DIY projects around the room.
A corkboard or inspiration board can provide another creative focal point. Pin fabric samples, colour palettes, magazine cut-outs, project ideas, and inspirational images to the board.
The goal is to create a space that motivates you to make things. When your supplies are organized and visually appealing, your craft room can feel more like a creative studio than a storage area.
8. Use Cabinets and Closed Storage for Clutter
While open storage is excellent for frequently used supplies, not everything needs to be on display. Cabinets and closed storage are useful for hiding less attractive items and keeping the room looking calm.
Use cabinets for bulky equipment, extra paper, seasonal supplies, unfinished projects, and materials you don’t use regularly.
If your craft room is small, choose furniture that combines multiple functions. A storage cabinet with a fold-out work surface can act as both a desk and a cupboard. An ottoman with hidden storage can provide seating while holding extra supplies.
You can also use the space underneath your desk. Rolling storage boxes or slim drawers can fit neatly beneath a work surface and provide additional room for craft materials.
When organizing cabinets, avoid simply throwing everything inside. Use labelled baskets or smaller boxes to create categories within each cabinet.
A useful strategy is to keep everyday supplies at eye level and less frequently used items on higher shelves. This makes your storage system more convenient and helps prevent unnecessary clutter.
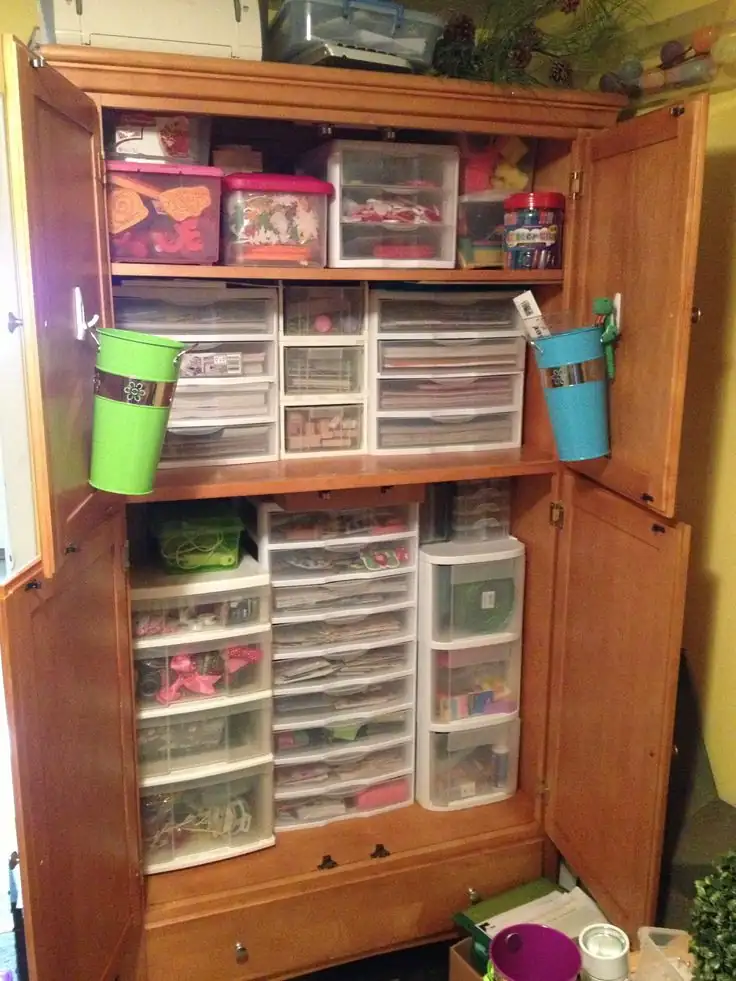
9. Set Up a Dedicated Paper and Scrapbooking Station
Paper crafts can require a surprising amount of storage. Scrapbook paper, cardstock, stickers, stamps, cutting tools, envelopes, and decorative elements can quickly take over a craft room.
Create a dedicated paper station to keep these supplies under control.
Vertical paper organisers are ideal for storing scrapbook paper and cardstock. Arrange papers by colour, theme, or size so you can quickly find what you’re looking for.
Use magazine holders or file boxes for smaller paper collections. Clear folders can keep individual scrapbook projects together and prevent loose materials from becoming scattered.
For stickers and embellishments, use small drawers or transparent cases. Group them according to themes such as flowers, holidays, birthdays, travel, or seasonal crafts.
If you enjoy using a cutting machine, create a dedicated area for it and its accessories. Keep cutting mats, vinyl, tools, and replacement blades nearby so everything you need is available in one location.
A well-organized paper station can save a huge amount of time and make creative projects much more enjoyable.
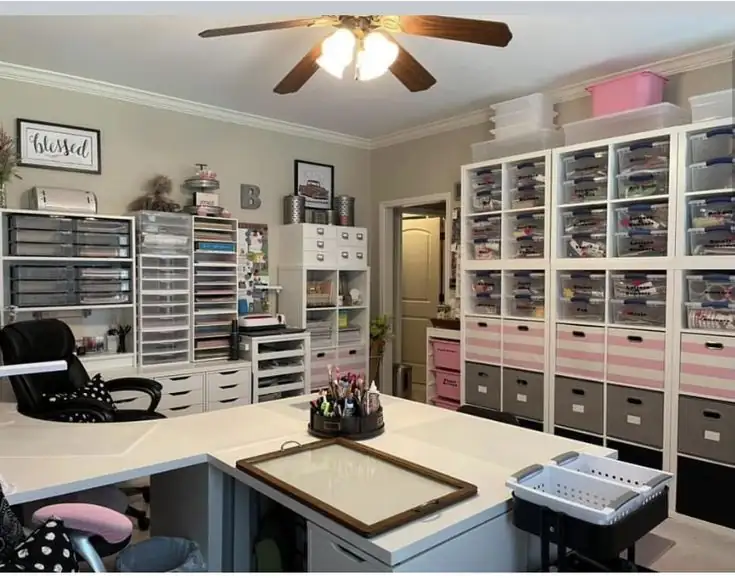
10. Create a Simple System for Cleaning and Maintaining
The best organization system is one that you can maintain. Even the most beautiful craft room will become cluttered if there isn’t a simple routine for putting things away.
Start by creating a “return home” for every item. When you finish using something, put it back in its designated location immediately rather than leaving it on your desk.
At the end of every crafting session, spend five to ten minutes resetting the room. Return tools to drawers, place leftover materials in their containers, and clear your main work surface.
You can also keep a small basket nearby for items that don’t belong in the current workspace. At the end of the day, empty the basket and return everything to its proper location.
Every few months, review your supplies and remove items you no longer use. Donate excess materials, recycle scraps where possible, and discard dried-out paints or broken tools.
If you frequently start projects but don’t finish them, create a dedicated unfinished-project box. Keep all the materials for each project together in a labelled folder, basket, or container. This prevents half-completed projects from taking over your workspace.
Remember that organization isn’t about creating a perfect room that never gets messy. Crafting is supposed to be creative and sometimes messy. The goal is to make cleanup easy enough that you can quickly restore order when you’re finished.
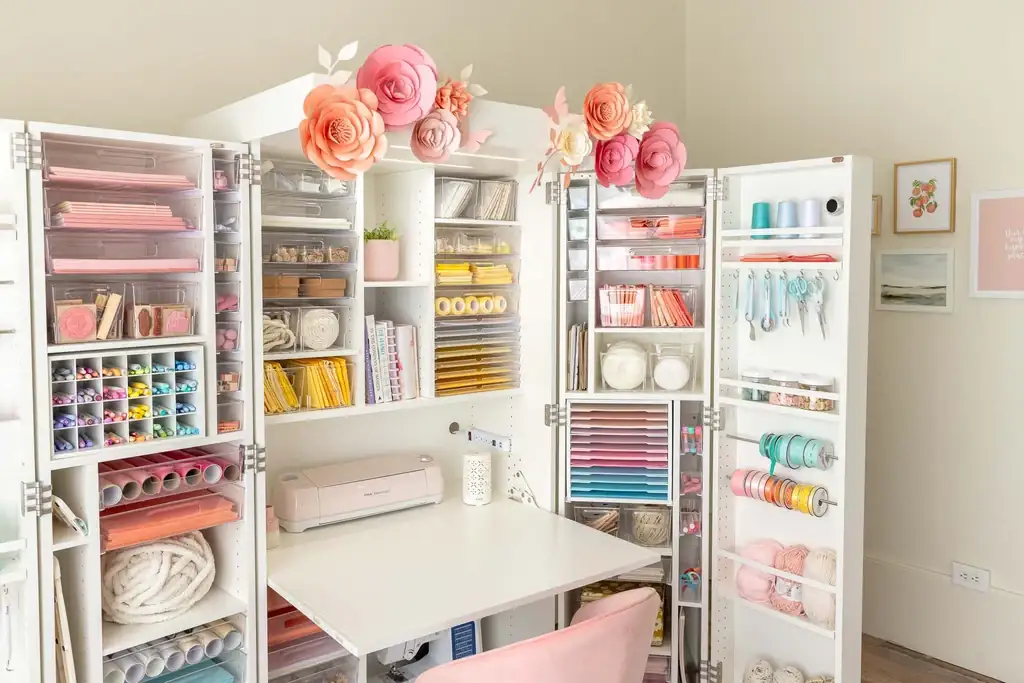
Bonus Tips for Organizing a Small Craft Room
You don’t need a large room to enjoy an organized crafting space. In fact, smaller rooms can sometimes be easier to manage because they encourage you to be intentional about what you keep.
Choose furniture that serves multiple purposes. A desk with drawers, a storage bench, or a fold-down table can provide both functionality and storage.
Take advantage of doors by adding hanging organizers. These can hold small tools, ribbons, wrapping supplies, or other lightweight materials.
Use every available corner wisely. A narrow rolling cart can fit between a desk and wall, while corner shelves can turn an unused area into valuable storage.
If your craft room doubles as another space, choose storage that can be easily concealed. Cabinets with doors allow you to hide supplies when the room needs to serve another purpose.
Another important tip is to avoid overfilling your storage. When every drawer and container is packed tightly, it becomes difficult to put things away. Leave a little breathing room so you can easily access and return your supplies.
How to Keep Your Craft Room Organized Long-Term
Once you’ve created your ideal storage system, maintaining it is the most important step. Start by following the simple rule: one item in, one item out. When you purchase new supplies, consider whether you have enough space for them and whether you still need older materials.
Try to store supplies according to how often you use them. Everyday tools should be easy to reach, while specialty supplies can be placed in less accessible storage.
Keep similar items together. Mixing craft categories can make it harder to find things and may cause you to purchase duplicates.
It’s also helpful to periodically photograph or inventory your supplies. This can remind you of what you already own before you buy something new.
At the beginning of each month, take a few minutes to check your craft room. Look for clutter that has started to accumulate and quickly reset the space.
If your organization system isn’t working, don’t be afraid to change it. Your crafting habits may evolve over time, and your storage should evolve with them.
Frequently Asked Questions (FAQ)
1. How do I organize a craft room on a budget?
You can organize a craft room on a budget by repurposing items you already have at home. Glass jars, shoe boxes, baskets, mason jars, and old containers can be used to store small craft supplies. Add simple labels and use vertical wall space with inexpensive shelves or pegboards. The key is to create a designated place for every type of supply rather than buying expensive storage furniture.
2. How do I organize a small craft room?
For a small craft room, focus on vertical storage and multifunctional furniture. Use wall-mounted shelves, pegboards, hanging organizers, and narrow rolling carts to maximise available space. Choose a desk with built-in drawers and use the space underneath for additional storage. Keeping frequently used supplies within easy reach and less-used items in closed cabinets can also help keep a small room organised.
3. What is the best way to organize craft supplies?
The best way to organise craft supplies is to group similar items together. Keep sewing materials, paper crafts, painting supplies, ribbons, beads, and tools in separate categories. Use clear containers and labelled bins so you can quickly find what you need. Organising supplies by type, colour, or frequency of use can make your craft room more functional.
4. How can I store small craft supplies?
Small craft supplies such as beads, buttons, sequins, clips, and embellishments are easiest to organise in small transparent containers, drawer dividers, compartment boxes, or stackable trays. Clear storage allows you to see your supplies quickly, while labels help you return everything to the correct location after each project.
5. How do I keep my craft room from getting messy?
The easiest way to prevent your craft room from becoming messy is to clean as you go. Return each tool to its designated storage location after using it and spend a few minutes resetting your workspace when you finish a project. A small basket for items that need to be put away can also help prevent clutter from building up on your desk.
6. How can I organise craft supplies without a craft room?
You don’t need a dedicated craft room to keep your supplies organised. A small cabinet, closet, bookshelf, rolling cart, or storage bench can create an efficient crafting station. Use labelled containers to keep different supplies separated and choose portable storage that can be moved when you need to craft in another room.
7. How often should I declutter my craft supplies?
It’s a good idea to review your craft supplies every few months. Remove broken tools, dried-out paints, unusable scraps, and materials you no longer need. Consider donating supplies that are still in good condition but haven’t been used for a long time. Regular decluttering will make it easier to maintain an organised and inspiring creative space.
Final Thoughts
An organized craft room can completely transform your creative experience. When every supply has a place and your favourite tools are easy to reach, you’ll spend less time searching for materials and more time enjoying your projects.
These 10 Craft Room Organization ideas show that a beautiful and functional creative space doesn’t require a huge budget or a large room. Simple solutions such as clear containers, wall-mounted storage, rolling carts, drawer dividers, and dedicated workstations can make a significant difference.
The most important thing is to design an organization system around the way you actually craft. Think about which supplies you use most, which materials need to be visible, and which items can be stored away. Then create a space that supports your creativity while making cleanup simple.
Whether you have an entire studio or a small crafting corner, the right organization can help you create a space that feels inspiring, practical, and uniquely yours. With a little planning and regular maintenance, your craft room can become a place where creativity flows freely and every project feels easier to start.
Explore More Home Organization & Decor Ideas
Looking for more practical ways to organize and decorate your home? Explore these related ideas for inspiration:
Laundry Room Organization: Discover smart storage solutions, clever shelving ideas, and easy ways to keep your laundry space neat, functional, and clutter-free.
Pantry Organization Ideas: Explore creative pantry storage ideas, labelled containers, space-saving solutions, and simple organizing tricks for a beautifully tidy kitchen pantry.
Halloween Decor Ideas: Get inspired by creative Halloween decorating ideas, from spooky entryways and festive living rooms to fun DIY decorations for a stylish seasonal home.